 ..the cat came back..
Recently Written
- Kiosk Browser Grows Up, Goes Pro
- Android App: Simple Kiosk Browser
- Widget, it’s got a widget…
- LinkUSB(i) and 1-Wire setup
- I am an IAMS cat
- LG TV Serial Control
- Tivo Return to UK Via Virgin Media
- Another Android Security Update
- Pictures from Computex 2009
- Pull That Squidgy iPhone application
- Extra Cupcake, Still No Latitude
- G1 Assault on battery
- Everywhere you go, always take the weather with you
- Pachube dials without the heartache
- Dynamic Dials Disclosed
- Gratifying Graphic Gizmos
- Current Cost Capers
- One Wireduino made easy
- WordPress tweetbacking
- What the UK VAT Reduction really means
Categories
- 1-Wire

- android
- arduino
- computex
- freerunner
- hardware
- image builds
- iphone
- kiosk
- learning
- linux
- neo 1973
- openmoko
- opensource
- personal
- software
- VoIP
Archives
- November 2011
- July 2011
- May 2011
- January 2011
- October 2010
- November 2009
- July 2009
- June 2009
- May 2009
- April 2009
- March 2009
- February 2009
- January 2009
- December 2008
- November 2008
- October 2008
- September 2008
- August 2008
- July 2008
- June 2008
- April 2008
- March 2008
- February 2008
- January 2008
- December 2007
- November 2007
- October 2007
- September 2007
Admin
Search
Nov
8
Kiosk Browser Grows Up, Goes Pro
14 years ago, mid-November | 37 Comments

Over the last few days I’ve worked on a new release of Kiosk Browser what I’m calling the SE (Special Edition) for now. I am undecided as to how I’ll distribute and license this and at what cost. I know that some of you are using Android tablets that do not have the Google Market on them. It may be that distribution is just an apk download from my server. I’m not sure many of you would appreciate entering licenses for each kiosk tied to a specific device, so I favour the one off fee, install however many times you want approach. I’ve put a poll at the end of this post, you can vote for the one you like the most or provide alternatives in the comments.
Kiosk Browser SE includes some extra, more advanced features such as
Home Screen
You can make Kiosk Browser SE the device home screen so that when pressing the home screen, or back button the user ends up in Kiosk Browser and not the ‘desktop’. When the device is booted Kiosk Browser SE will automatically start.
Orientation Lock
Kiosk Browser SE can lock the screen in landscape or portrait mode.
Wake Lock
If you don’t want your kiosk to sleep you can force it to stay awake.
Options are,
off: The device will sleep as normal. This may result in loss of network connectivity and the lock screen may appear.
dim: Wake lock that ensures that the screen is on (but may be dimmed); the keyboard backlight will be allowed to go off.
full: Wake lock that ensures that the screen and keyboard are on at full brightness.*
*be aware of screen burn in and panel lifetime.
Idle Timeout
If there’s no input from the user you can jump back to the start url after a number of minutes you specify.
Capture Images
You can automatically capture images from the front camera and/or the screen when the user interacts with Kiosk Browser SE. You can have either image captured or both. If you have both each image filename is stamped with the same time. You can tag your kiosk files with a specific identity to help keep files unique. Useful if multiple kiosks are uploading to the same space.
Upload Images
Captured images can be FTP’d to a server, once complete they are removed from local storage to free up space. The target FTP path can also be specified.
Remote Load
Sometimes it may be useful to load a new configuration from a remote server. On boot Kiosk Browser SE will check for a local configuration file and then optionally a remote one. The local configuration file can be automatically deleted once loaded so can be used for initial provisioning. Settings are saved internally so after configuration updates the kiosk can operate without the presence of the configuration file on the remote server.
XML Configuration
Configuration is via XML, there is no preferences screen.
I’ll update this post with the status of Kiosk Browser SE as development progresses. I’ve set myself a target date for release, so far that’s looking good. Of course there’s still the documentation to do as well.
you can look to the Kiosk Browser SE pages for more detail on the Pro version
If you’re twitter minded you can follow Kiosk Browser for updates and news Follow @KioskBrowser

Tagged with: android • kiosk • software
November 8, 2011 10:50
Jul
9
Android App: Simple Kiosk Browser
14 years ago, mid-July | 36 Comments
Kiosk Browser, is as its name suggests, a browser that acts like a kiosk.

You can limit the browser to a specific site or allow external sites to be loaded, optionally in the default standard browser. The browser has some additional features allowing the sending of Toast messages to the user from javascript, showing and hiding the title bar and launching applications on the device.
These special functions available from Javascript are demonstrated by the code below:
<input type="button" value="Show Preferences screen" onClick="Kiosk.showPreferences(); return false;" />
<input type="button" value="Show Platform Settings" onClick="Kiosk.platformSettings(); return false;" />

<input type="button" value="Clear cache, form data, history" onClick="Kiosk.clearCaches(); return false;" />

<input type="text" size=30 name=something>
<br>
<input type="button" value="Back" onClick="Kiosk.goBack(); return false;" />
<input type="button" value="Forward" onClick="Kiosk.goForward(); return false;" />
<input type="button" value="Reload" onClick="Kiosk.reload(); return false;" />
<input type="button" value="Stop" onClick="Kiosk.stop(); return false;" />


<input type="button" value="Disable Menus" onClick="Kiosk.disableMenus(); return false;" />
<input type="button" value="Enable Menus" onClick="Kiosk.enableMenus(); return false;" />
<input type="button" value="Disable Scaling" onClick="Kiosk.disableScaling(); return false;" />
<input type="button" value="Enable Scaling" onClick="Kiosk.enableScaling(); return false;" />


<input type="submit" value="Android app interface" onClick="Kiosk.showToast('Hello Android!'); return false;" >

<input type="button" value="Fullscreen" onClick="Kiosk.hideTitlebar(); return false;" >
<input type="button" value="With title" onClick="Kiosk.showTitlebar(); return false;" >
<input type="button" value="Restart" onClick="Kiosk.endApp(); return false;" >
<input type="button" value="Launch" onClick="Kiosk.launch('fm.last.android','fm.last.android.LastFm'); return false;" >
<input type="button" value="Launch 2" onClick="Kiosk.launch('fm.last.android-1','fm.last.android-1.activity.Profile_RadioTab'); return false;" >


<a href=http://www.google.co.uk>External</a> |
UPDATE: 04-November-2011: Added more javascript interfaces and preferences… (sorry about the 2 updates in one go) Second update allows for zoom to be set from 1 to 200
UPDATE: 29-October-2011: Rearranged some of the options to make preferences a little less messy.
Added an optional “Page Loading” message, this blocks screen access until the page has completely loaded so be aware that it may just sit there forever if your network drops out. The good news is the addition of the labs section may help here.
Also added a ‘Labs’ preference section where experimental stuff can go. Currently there’s one active preference in there called “Network Connect”. What this does is run the kiosk application when the network goes up or down. What this means is that you can have the kiosk automatically run when the device boots (and gets unlocked). Feedback on how useful it is would be useful 😀
Seems I’ve managed to mess up the comments section :/
Some simple documentation is available here
There’s also some information on the next iteration of Kiosk Browser
Tagged with: android • kiosk • software
July 9, 2011 15:14
May
20
Widget, it’s got a widget…
14 years ago, mid-May | Leave a Comment
John Smiths have a lot to answer for there I can tell you.
It’s been a busy few weeks at work while 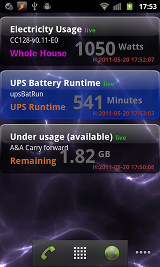 we launch our revamped online shop and how did I go about relaxing? I did more development work at home. Since we’ve moved into our house I haven’t really had a lot of time to do much development, more tiling grouting and renovating than anything else. This last week though, as we started to get on top of things, I took some time to put together a widget for Android. I’ve been collecting, storing and graphing data from various sensors around the house for some time now and while the graphs are pretty they aren’t really a quick or efficient way of reading the status at a glance.
Step forward the widget. Each widget requests XML data from the server and presents it on the widget, this allows an infinite number of widget variations since the only change is the data received. In other words, if it’s in the database it can be served. The widget itself has a number of coloured backgrounds which the server data can trigger if and it’s also capable of playing an alarm sound if required. I still need to fix this because the alarm sound triggers on each update and there’s currently no way to tell the widget to be quiet.
Update: Fixed this, tapping the widget will silence it until the next alarm trigger ie once the state returns to normal and then alarms once again.
Incidentally, since I only have a self signed certificate on my server but still wanted encrypted access I had to extend the DefaultHttpClient. By default Android will just refuse to connect to a server if the certificate isn’t signed by one of the ‘trusted’ certificate authorities – it wont tell you that it refused, it’ll just silently fail. You’d only ever really know if you’d connected to your device via adb and done a logcat. You can get round this by adding a keystore to your application, which is good enough for testing or personal applications.
If you want to do this you need to make sure you have the Bouncy Castle cryptography jar in your CLASSPATH. The first thing you’ll need is a copy of the certificate which I hope you’ve generated and installed on your server. If you need to get a remote server certificate you can use the following command (all one line).
echo | openssl s_client -connect your.server.goes.here:443 2>&1 | sed -ne '/-BEGIN CERTIFICATE-/,/-END CERTIFICATE-/p' > mycert.pem |
Replace the “your.server.goes.here” with your server, obviously. Once you’ve done that export the CLASSPATH to the Bouncy Castle jar you downloaded replacing the path I’ve used with the location you downloaded it to:
export CLASSPATH=bcprov-jdk16-146.jar |
You can now use the following script, note that the keystore name is appkeystore.bks as on line 3
1 2 3 4 5 6 7 8 9 10 11 12 13 14 15 16 17 18 19 | #!/bin/bash CERTSTORE=appkeystore.bks if [ -a $CERTSTORE ]; then rm $CERTSTORE || exit 1 fi keytool \ -import \ -v \ -trustcacerts \ -alias 0 \ -file <(openssl x509 -in mycert.pem) \ -keystore $CERTSTORE \ -storetype BKS \ -provider org.bouncycastle.jce.provider.BouncyCastleProvider \ -providerpath /usr/share/java/bcprov.jar \ -storepass MyPaSsWoRd |
Replacing the MyPaSsWoRd on line 19 with a password of your choosing, you’ll need it later too. If you run the script you should get some output like this, obviously with your server information – remember to answer yes to the “Trust this certificate” prompt.
Owner: EMAILADDRESS=info@ automated.it, CN=www.automated.it, OU=Tech, O=Automated IT, L=Eye, ST=Suffolk, C=GB Issuer: EMAILADDRESS=info@ automated.it, CN=www.automated.it, OU=Tech, O=Automated IT, L=Eye, ST=Suffolk, C=GB Serial number: 4dce9c74 Valid from: Sat May 14 16:15:00 BST 2011 until: Sun May 13 16:15:00 BST 2012 Certificate fingerprints: MD5: 32:0F:33:0C:42:8D:FF:78:90:46:31:7A:4F:D3:33:23 SHA1: BD:A8:B8:21:B1:48:C3:53:BB:01:22:65:9E:00:6E:14:7B:DE:4E:F6 Signature algorithm name: SHA1withRSA Version: 1 Trust this certificate? [no]:yes Certificate was added to keystore [Storing appkeystore.bks] |
Create a directory called “raw” in your project’s ‘res‘ folder and copy the appkeystore.bks file to it.
In your Android application or widget you can now create a new class for the following code which will extend the original DefaultHttpClient class. You’ll want to change the package name on line 1 to match your application.
1 2 3 4 5 6 7 8 9 10 11 12 13 14 15 16 17 18 19 20 21 22 23 24 25 26 27 28 29 30 31 32 33 34 35 36 37 38 39 40 41 42 43 44 45 46 | package your.package.name.here import android.content.Context; import org.apache.http.conn.ClientConnectionManager; import org.apache.http.conn.scheme.PlainSocketFactory; import org.apache.http.conn.scheme.Scheme; import org.apache.http.conn.scheme.SchemeRegistry; import org.apache.http.conn.ssl.SSLSocketFactory; import org.apache.http.impl.client.DefaultHttpClient; import org.apache.http.impl.conn.SingleClientConnManager; import java.io.InputStream; import java.security.KeyStore; public class myHttpClient extends DefaultHttpClient { final Context context; public String UserAgent="Android dataWidget (ScaredyCat 0014150511-0.1b) [http://blog.automated.it]"; public myHttpClient(Context context) { this.context = context; } @Override protected ClientConnectionManager createClientConnectionManager() { SchemeRegistry registry = new SchemeRegistry(); registry.register( new Scheme("http", PlainSocketFactory.getSocketFactory(), 80)); registry.register(new Scheme("https", newSslSocketFactory(), 443)); return new SingleClientConnManager(getParams(), registry); } private SSLSocketFactory newSslSocketFactory() { try { KeyStore trusted = KeyStore.getInstance("BKS"); InputStream in = context.getResources().openRawResource(R.raw.appkeystore); try { trusted.load(in, "MyPaSsWoRd".toCharArray()); } finally { in.close(); } return new SSLSocketFactory(trusted); } catch (Exception e) { throw new AssertionError(e); } } } |
Note that the password used in the script earlier should match the one on line 37– use your own different password in production for security purposes. You can now use the class as required in your application, for example:
1 2 3 4 5 6 7 8 9 10 11 12 13 14 | myHttpClient httpclient = new myHttpClient(context); httpclient.getCredentialsProvider().setCredentials(new AuthScope(host, port), new UsernamePasswordCredentials(username,password)); BasicHttpContext localcontext = new BasicHttpContext(); BasicScheme basicAuth = new BasicScheme(); localcontext.setAttribute("preemptive-auth", basicAuth); httpclient.addRequestInterceptor(preemptiveAuth, 0); HttpHost targetHost = new HttpHost(host, port, scheme); HttpGet httpget = new HttpGet(url); httpget.setHeader("User-Agent", httpclient.UserAgent ); |
Once I’d got the SSL connection I could get the application to download a list of sensors from the database, this only happens the first time the first widget is added to the home screen. I need to sort a way of allowing the user to delete the list if more sensors are added. At the moment clearing the data for the widget application works but it erases the widget settings too.
When I’m at home I want to connect to a local server for the information for the widgets and when I’m out and about (using a 3G connection) I want to connect to an external server. I implemented the ability to automatically switch when my phone connected to my WiFi access point. One final thing I did was to add the ability to long press on a text field and then select ‘Save as default‘ allowing things like servers, Wifi MAC address, username and password to be saved as the defaults for all widgets.
![]()
![]()
![]()
![]()
Tagged with: 1-Wire • android • currentcost • opensource • software
May 20, 2011 21:10
Jan
18
LinkUSB(i) and 1-Wire setup
14 years ago, mid-January | 2 Comments
I’ve just configured my monitoring machine to use a LinkUSBi 1-Wire interface and it’s a rather simple process. First of all we’ll setup One Wire File System, or OWFS ") for short, then we’ll add some udev rules and finally plug in a device and get some readings. Since we need to build OWFS we’re going to need a new libraries and files installed, I’m making the assumption that you already have automake, autoconf, autotools-dev, gcc, g++ installed so you can go ahead and install the libraries we need.
for short, then we’ll add some udev rules and finally plug in a device and get some readings. Since we need to build OWFS we’re going to need a new libraries and files installed, I’m making the assumption that you already have automake, autoconf, autotools-dev, gcc, g++ installed so you can go ahead and install the libraries we need.
apt-get install libtool libusb-dev fuse-utils libfuse-dev swig python2.6-dev tcl8.4-dev php5-dev
You don’t actually have to have Python, Tcl or php5 installed if you don’t want them they add to the interfaces you can use with OWFS – unless you specifically don’t want them you may as well include them. Once the installs above have completed you’ll need to get a copy of OWFS – be sure to download the latest version of it.
Update : I’ve rolled back to using 2.8p4 since 2.8p5 seems to have some problems with owserver (owfs still works fine).
Once you’ve downloaded you’ll see the file is called something like owfs-2.8p5.tar.gz – this file name is made up of owfs-[version of owfs].tar.gz In my case I have version 2.8p5. Your version may differ, don’t worry about that (unless it’s older!). Now extract the tarball with
tar -zxvf owfs-2.8p5.tar.gz
replacing the file name with whichever version you downloaded. This will extract a lot of files and place them in a directory with the same name as the file you downloaded, minus the ‘.tar.gz’. Move to that directory with
cd owfs-2.8p5
now we need to run the configure and make scripts. First configure, if this fails make sure you have all the dependencies required.
./configure
this will spit out reams of text which really only matters if something goes wrong. The last few lines should be something like this
Current configuration:
Deployment location: /opt/owfs
Compile-time options:
Caching is enabled
USB is enabled
I2C is enabled
HA7Net is enabled
W1 is enabled
Multithreading is enabled
Parallel port DS1410E is enabled
TAI8570 barometer is enabled
Thermocouple is enabled
Zeroconf/Bonjour is enabled
Debug-output is enabled
Profiling is DISABLED
Tracing memory allocation is DISABLED
1wire bus traffic reports is DISABLED
Module configuration:
owlib is enabled
owshell is enabled
owfs is enabled
owhttpd is enabled
owftpd is enabled
owserver is enabled
ownet is enabled
ownetlib is enabled
owtap is enabled
owmon is enabled
owcapi is enabled
swig is enabled
owperl is enabled
owphp is enabled
owpython is DISABLED
owtcl is enabled
Now we build OWFS using make
make
After some churning, spewing output, cpu usage and warning messages (ignore them), which may all take 10 minutes or more depending on your cpu and memory, you should get your prompt back. Finally install owfs – do this as root.
make install
Since we need to mount the OWFS somewhere we create a directory
mkdir /var/lib/1wire
Ok, so now we come to the hardware side of things – I got my LinkUSBi from HomeChip – the ‘i’ variant has it’s own identity which may or may not be useful to you. If I’m honest I accidentally picked the ‘i’ version and could have easily saved 80 pence and gone for the non-‘i’ version without trouble – Quick Note, as I write this Quinten has had some issues that need investigation, he has the non-‘i’ variant – for now I’d stick with the ‘i’ variant that we know works. I’ll update once I get more information about the issue. Turns out that version 2.8p4 of OWFS worked with the LinkUSB for Quinten. The LinkUSB or LinkUSBi is the interface to 1-Wire devices, so now’s the time to plug it in. Be aware that if you have other FTDI devices you might want to set up some udev rules. This is what I have in a file called /etc/udev/rules.d/60-usb-serial.rules
# /etc/udev/rules.d/60-usb-serial.rules

# Determine XBEE, Current Cost and 1wire USB ports
KERNEL=="ttyUSB*", \
ATTRS{idVendor}=="0403", ATTRS{idProduct}=="6001", ATTRS{serial}=="A600eD0C", \
SYMLINK+="1wire"
KERNEL=="ttyUSB*", \
ATTRS{idVendor}=="067b", ATTRS{idProduct}=="2303", \
SYMLINK+="currentcost"
KERNEL=="ttyUSB*", \
ATTRS{idVendor}=="0403", ATTRS{idProduct}=="6001", \
SYMLINK+="xbee"
Since I have 3 USB serial devices, a currentcost unit, some Xbee based wireless 1-wire devices I made and the LinkUSBi, two of which are FTDI I need to identify each so use the ATTRS{serial} to uniquely identify the LinkUSBi via its serial number. You can glean the serial number by using
lsusb -vv
and look at the output for the serial number of device you’re interested it. Once our LinkUSBi is connected and detected we can mount OWFS with
/opt/owfs/bin/owfs -d /dev/1wire -m /var/lib/1wire
Note that I use -d/dev/1wire because my udev rules create a symlink. If you don’t create the symlink then your device will be something like /dev/ttyUSBx – where x = a number. Now we can look at any attached devices with
# ls /var/lib/1wire/

01.BA0E0E140000  28.1842A1020000  alarm  bus.0	settings  simultaneous	statistics  structure  system  uncached
The 01.XXXXXX device is the LinkUSBi and the 20.XXXXX device is a DS18S20 temperature sensor. To read the output of the temperature sensor we simply do
cat /var/lib/1wire/28.1842A1020000/temperature

16.0625
As you can see the temperature is a rather chilly 16.0625 degrees Celsius. Stuart Poulton has some 1-Wire kits available to buy for creating some domestic environment friendly temperature sensors and Quinten has some good pictures of them. Kevin has also got some newer pictures up – thanks for the headsup Kevin.
Tagged with: 1-Wire • linux • opensource
January 18, 2011 20:47
Oct
20
I am an IAMS cat
15 years ago, mid-October | 1 Comment
After an eternity of waiting Current Cost have finally made their IAMS available to buy. One might have expected a fanfare, we’ve been waiting for these for over a year now, but there was nothing, no blog post, no tweet, nada. Thankfully Kevin Turner (@netcompsys) spotted them for sale. For those not familiar with the IAMS (Individual Appliance Monitors) when used in conjunction with a Current Cost monitor (compatible with Trec, Envi, EnviR ,EnviRW) an IAM allows you to measure the electricity usage for an appliance. Multiple IAMS can be used with a single monitor to give you an overview of your total usage.
 As you can see from the graphs at the bottom of this post there’s clearly something not quite right with my fridge-freezer. Every hour for half an hour it uses 400 Watts. Lets do a couple of calculations and find out what this really means in electricity usage and how much money I’m frittering away.
        400 / 2 == 200 (Watts per hour) - half

        24 * 0.2 == 4.8 (kWh)

        4.8 * 365.25 == 1753 (kWh per year)
You read that right. It’s using 4.8kWh a day! Most modern fridge freezers use around 300kWh a year, depending on their size, and I’m using nearly six (6) times that. Let’s say I’m paying 12.5 pence per kWh. In one year my current fridge-freezer is costing me £219.13 versus £39.50 if I were to buy a new one – that’s £179.63 difference. If I pick a new fridge-freezer that uses less than 300kWh a year the saving increases. I could almost buy a new fridge freezer each year with the money I’m wasting!
As you can see, being able to measure what’s going on by using the IAMS has highlighted that I really need to replace my existing fridge freezer with something much more efficient.
Taking another look at the graph you can see one other area that needs to be looked at. Those computers are eating a lot of electricity. Only this morning did I get round to plugging my laptop into an IAM to measure it’s power use. 45W .. all day .. every day.. Let’s just say that it’s prime for replacement but also that it does now get powered off when it’s not being used.
So, get measuring and get saving!
![]()
![]()
![]()

Tagged with: currentcost • electricity • iams
October 20, 2010 13:13
Current Electricity Use (15min)
iPhone/Webkit RSS Reader
Links
- automated home
- Automated It Technology News
- awooga!!!
- LinITX
- My Acer page
- My Asterisk pages
- My Work in progress (old)
- Noble Race Car
- openmoko / neo 1973 wiki
- planet openmoko
- Spadgecock Cumpants
Tags
1-Wire android api Apple arduino currentcost DDAR development DVD FIC freerunner G1 google Google Phone gphone gprs GPS hardware image image builds inspiration iphone jailbreak kiosk linux Mac monitoring Music neo 1973 Nokia openmoko opensource OSX Pachube personal qtopia rhubarb rikki Rio slimp3 slimserver software tracking Trolltech u-bootTwitpic
Graphy Stuff


